

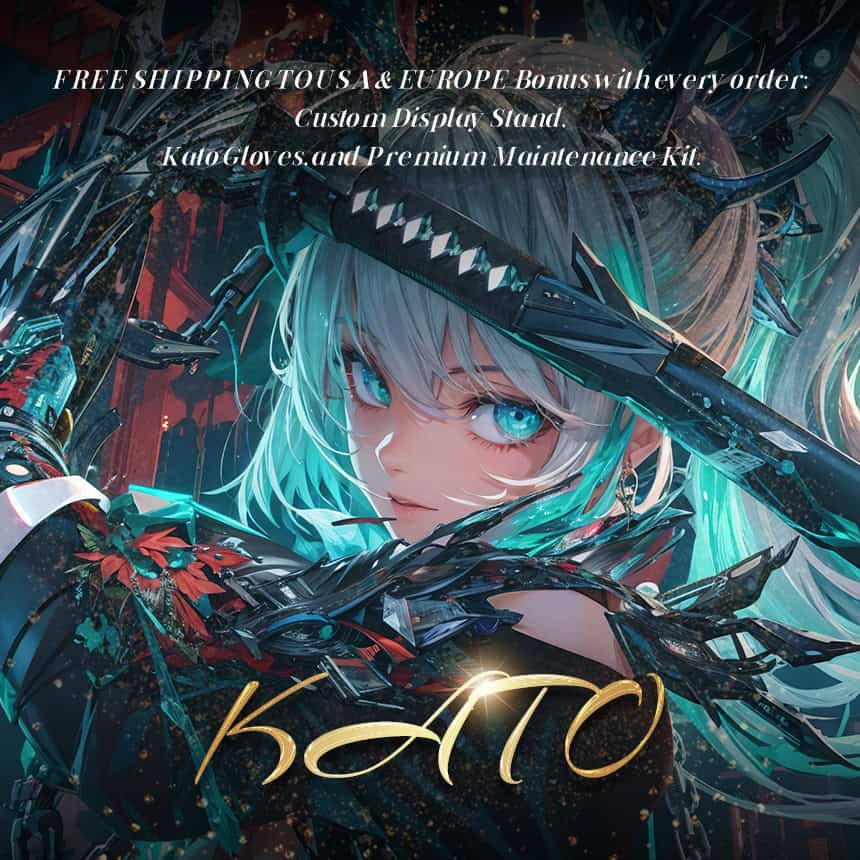
How to Design a Custom Katana: A Step-by-Step Guide
Designing a custom katana means making 20+ decisions in a configurator with no guidance on what matters and what to leave alone. Most buyers stall somewhere between steel type and tsuba style, unsure which choices affect performance and which are cosmetic details.
This guide walks through how to design a custom katana using an online builder where professional smiths forge the sword to your specs. It is not a DIY blacksmithing tutorial. You will follow the same sequence most configurators use: blade, edge and finish, handle and fittings, then scabbard. Each section tells you which options shape performance and price the most, and which ones are safe to skip.
For most buyers, the process comes down to five choices that matter: steel, blade length, edge type, hamon, and fittings theme. Get those right, and the rest can stay at default.
What to Decide Before You Design a Custom Katana
Before opening any configurator, answer one question: what is this katana for?
Your intended use filters every decision that follows. Write down your purpose and keep it visible while you build. It prevents second-guessing at every step.
- Display and collection: visual impact matters most; you do not need a razor edge or battle-grade steel
- Cutting practice (tameshigiri): tough steel and a sharp edge take priority over ornate fittings
- Martial arts training (iaido or kenjutsu): proper balance and blade length matched to your body matter more than aesthetics
- Anime or cosplay replica: accurate color, tsuba design, and saya finish drive the build; confirm which details the configurator covers and which require custom work
Set a rough budget before you start clicking. Steel type is the single biggest price variable, and fittings upgrades stack fast. Entry-level custom builds typically start around $200 to $300 with standard steel and basic fittings. Premium builds with upgraded steel, custom polish, and themed fittings reach $500 to $800 or more.
If you are building a replica or themed sword, gather your reference images before you begin. Share them with the maker’s team to confirm what the builder can handle. Replica accuracy and cutting performance do not always point to the same build choices, so confirm which priority drives your order. A wall-display replica and a functional cutting replica require different steel and edge choices even when the visual design is identical.
How to Pick Steel and Blade Shape for Your Custom Katana
Steel and blade shape form the foundation of every custom katana design. Steel determines what the sword can do. Blade shape determines how it looks and handles in your grip.
Which Steel Type Fits Your Custom Katana Build?
Steel sets the price floor and performance ceiling for the entire build. Rather than memorizing metallurgy specs, match your purpose to a starting point:
- Display or light use: 1045 carbon steel or Damascus offer visual appeal at lower cost
- Regular cutting practice: 1060 or 1095 carbon steel provide solid edge retention and durability for repeated tatami cuts
- Serious tameshigiri or martial arts: T10 tool steel or spring steels (5160, 9260) deliver maximum toughness under hard use
- Collector or premium build: Tamahagane replica steel for traditional authenticity
Most buyers land on 1060 or T10 as practical sweet spots. If this is your first custom katana and you want a functional blade without overpaying, 1060 is the easier starting point. If both visual hamon and cutting performance matter, T10 is usually the first upgrade buyers compare against 1060.
Kato’s custom katana builder offers multiple steel options ranging from entry-level carbon steel to premium Tamahagane replica. If you want the full breakdown of hardness ratings, edge retention, and care requirements for each option, the dedicated guide on best steel for a katana covers them all in detail.
How Blade Shape (Zukuri) Changes Your Katana’s Look and Cut
Zukuri (blade cross-sectional geometry) affects how the sword cuts, balances, and looks on display.
Shinogi-Zukuri is the classic katana profile with a defined ridge line running along the blade. It works for both cutting and display, which is why most builders set it as the default. Unless you have a specific reason to change it, this is the safe pick.
Other profiles serve more targeted purposes:
- Shobu-Zukuri: removes the yokote (tip line) for a smoother transition into the kissaki (tip area), popular among cutting-focused buyers
- Unokubi-Zukuri: narrows the spine near the tip, making the blade lighter and faster through targets
Kato offers several additional blade shapes for buyers who want something distinctive, but Shinogi-Zukuri covers the widest range of uses.
How to Set Blade Dimensions for Your Custom Katana
With steel and shape locked in, the next group of choices sets the physical dimensions of your blade and handle.
Choosing the Right Blade Length (Nagasa) and Handle Length
Blade length (nagasa) is measured from the tip to the habaki notch. The standard katana range is 27 to 28 inches, which fits most people between 5’6″ and 6’0″.
Here is how different lengths match different needs:
- Shorter nagasa (24 to 26 inches): suits smaller users, indoor practice spaces, or quick-draw styles like battojutsu
- Longer nagasa (29 to 31 inches): adds reach but demands more wrist strength and control, especially during one-handed cuts
- Shorter tsuka/handle (9 to 10 inches): favors agility and quick transitions
- Longer tsuka (11 to 15 inches): gives leverage for two-handed power cuts, often preferred in iaido for smooth drawing mechanics
Use a height-to-length reference and a floor clearance test before committing. The full sizing method is covered in the guide on how to choose katana length for your height.

Blade Width, Thickness, and Groove: When to Keep the Defaults
Most buyers should keep haba (blade width) and kasane (blade thickness) at their default values. The forge calibrates these to the chosen blade length and steel type, and changing them without a clear reason can throw off balance.
When adjusting makes sense:
- Wider haba: adds visual weight and presence (good for display builds)
- Thicker kasane: increases durability for heavy cutting at the cost of added blade weight
- Thinner kasane: glides faster through soft targets like tatami
Bohi (fuller groove) reduces blade weight, shifts the balance point toward the handle, and produces the tachi-kaze whistling sound during swings. Choosing “No Bohi” makes the blade heavier but sturdier for impact-heavy cutting. Kato offers groove variants including Naginata-Hi, Futasuji-Hi (double groove), and Naginata-Hi with Soe-Hi. If you are not chasing a very specific weight target, this is not the place to experiment on a first build.
How to Choose Edge, Hamon, and Blade Finish for Your Katana
At this point, the sword’s handling is mostly decided. The next choices shape how the blade looks and how refined the finished piece feels.
Sharp or Blunt: Picking the Right Cutting Edge (Ha)
Ha (cutting edge) determines whether the sword is sharp or blunt. Choose based on intended use and local legal requirements:
- Functional edge for cutting practice: sharp enough to slice rolled tatami cleanly
- Display or training edge: stays blunt for safety and legal compliance
Yokote is the line separating the main blade face from the kissaki (tip). A defined geometric yokote gives a traditional, structured look. A smooth transition reads as more modern. Unless you are matching a specific historical reference, either option works.
If you are buying for cutting, select a sharp edge with standard yokote. For display, spend your attention on yokote style and the hamon pattern below.
How to Choose a Hamon Pattern for Your Custom Katana
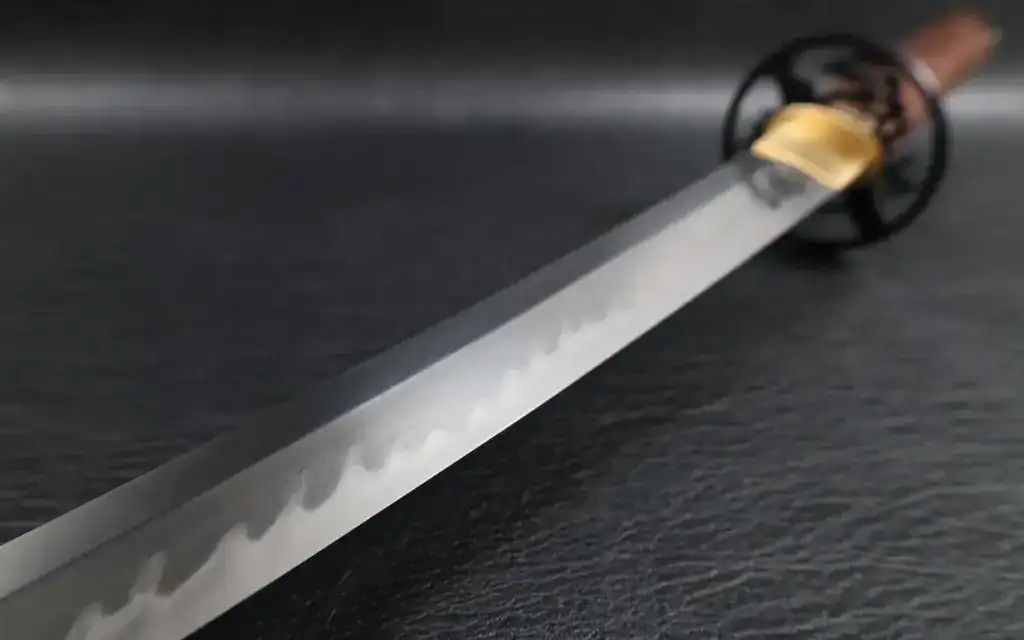
The hamon (temper line) is the single most visible design element on the blade. It is created during differential hardening, where the edge and spine are heat-treated at different rates to produce a visible boundary between hard steel and softer steel.
Common hamon patterns and their visual character:
- Suguha (straight line): calm, minimal, elegant
- Midare (irregular wave): the most popular choice, dramatic and dynamic
- Gunome (rounded wave): structured, rhythmic, visually balanced
- Notare (gentle wave): sits between Suguha and Midare in visual energy
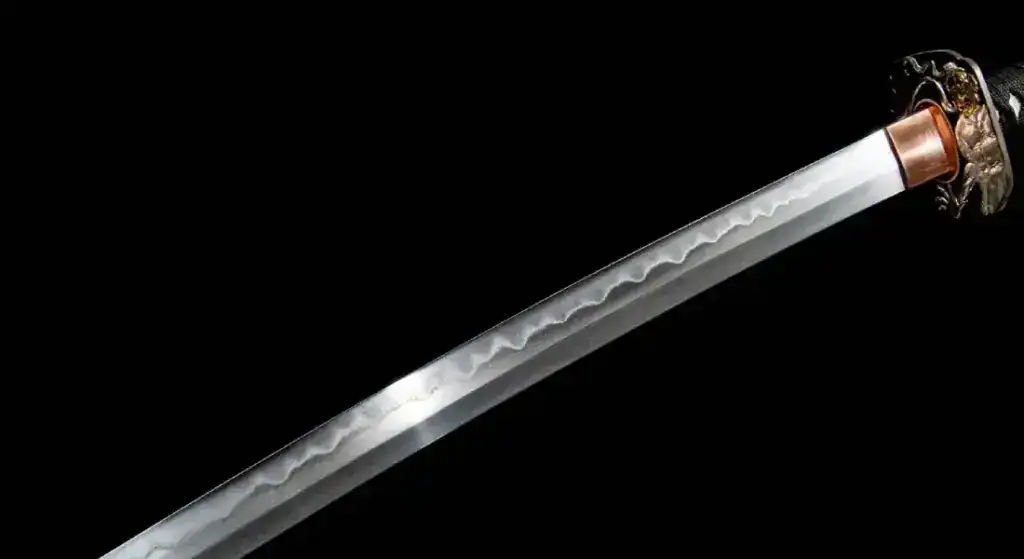
The hamon is not decorative paint. It marks a real transition in steel hardness, which is why blade performance and visual identity are connected in this one choice. For a deeper look at how differential hardening creates each pattern, see the guide on hamon on a katana.
Polish, Inscription, and Other Custom Katana Finishing Touches
Blade polish determines how much of the hamon, hada (steel grain pattern), and blade geometry are visible to the eye. Higher polish grades reveal more surface detail and cost more. A mid-grade polish shows the hamon clearly and works for most builds. Collectors often get more visual impact from upgrading polish and choosing a distinctive hamon than from changing every structural spec.
Mei (tang inscription) lets you add a name, date, or dedication carved into the nakago (tang). It does not affect performance but adds authenticity and personal value. Most buyers skip the inscription unless the sword is a gift or heirloom piece.
Most first-time buyers get more value from picking the right steel and hamon than from fine-tuning polish grade or adding an inscription. Lock in the high-impact choices first, then decide how much finishing detail your budget allows.
How to Complete Your Custom Katana: Handle, Fittings, and Scabbard
The blade is complete on paper. The remaining choices shape everything the viewer sees and the wielder feels.
How to Pick Handle Wrapping and Rayskin for Your Katana
Tsuka-ito (wrapping material) is a practical choice that affects grip and durability:
- Cotton: durable, good grip in dry and sweaty conditions, affordable (the default for most builds)
- Silk: traditional and visually refined, but less durable under heavy training use
- Leather: modern feel with strong grip, stands up to frequent handling
Tsuka-maki (wrapping style) affects the diamond pattern on the handle. Hineri-maki is the classic diamond wrap most buyers expect. Katate-maki is a tighter battle wrap preferred for serious cutting where grip security matters most.
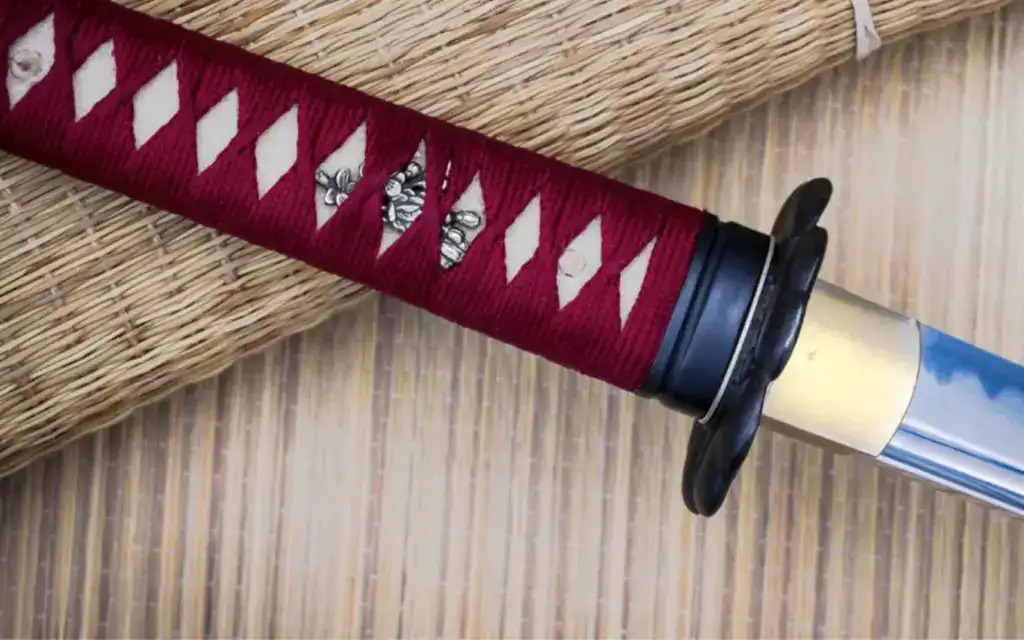
Samegawa (rayskin) goes under the wrap for grip texture and structural support. Full-wrap samegawa is a premium upgrade. Panel-wrap is the cost-efficient standard that still provides solid grip. Hishigami (paper wedges) tucked inside the wrap ensure tight, even diamond shapes.
For a visual reference showing how tsuka-ito, samegawa, menuki, and other handle components fit together, the anatomy guide on parts of a katana breaks down each layer.
How to Choose a Tsuba and Metal Fittings for Your Katana
Tsuba (handguard) is the most expressive fitting on the sword. Pick based on theme and material:
- Iron tsuba: heavier, traditional feel, works for classical or historical builds
- Alloy tsuba: lighter, more design variety, suits modern or anime-themed builds
- Anime-themed or custom-design sets: available for buyers building a replica or pop-culture sword
Fuchi and kashira (collar and pommel) frame the handle at both ends. Match them to the tsuba so the fittings tell a consistent visual story.
Menuki (handle ornaments) sit under the wrapping and add subtle grip texture plus visual personality. Animals, family crests, and mythological figures are common choices. Habaki (blade collar) and seppa (spacers) secure the blade in the mount. These are structural components, and most buyers keep the default options without issue.
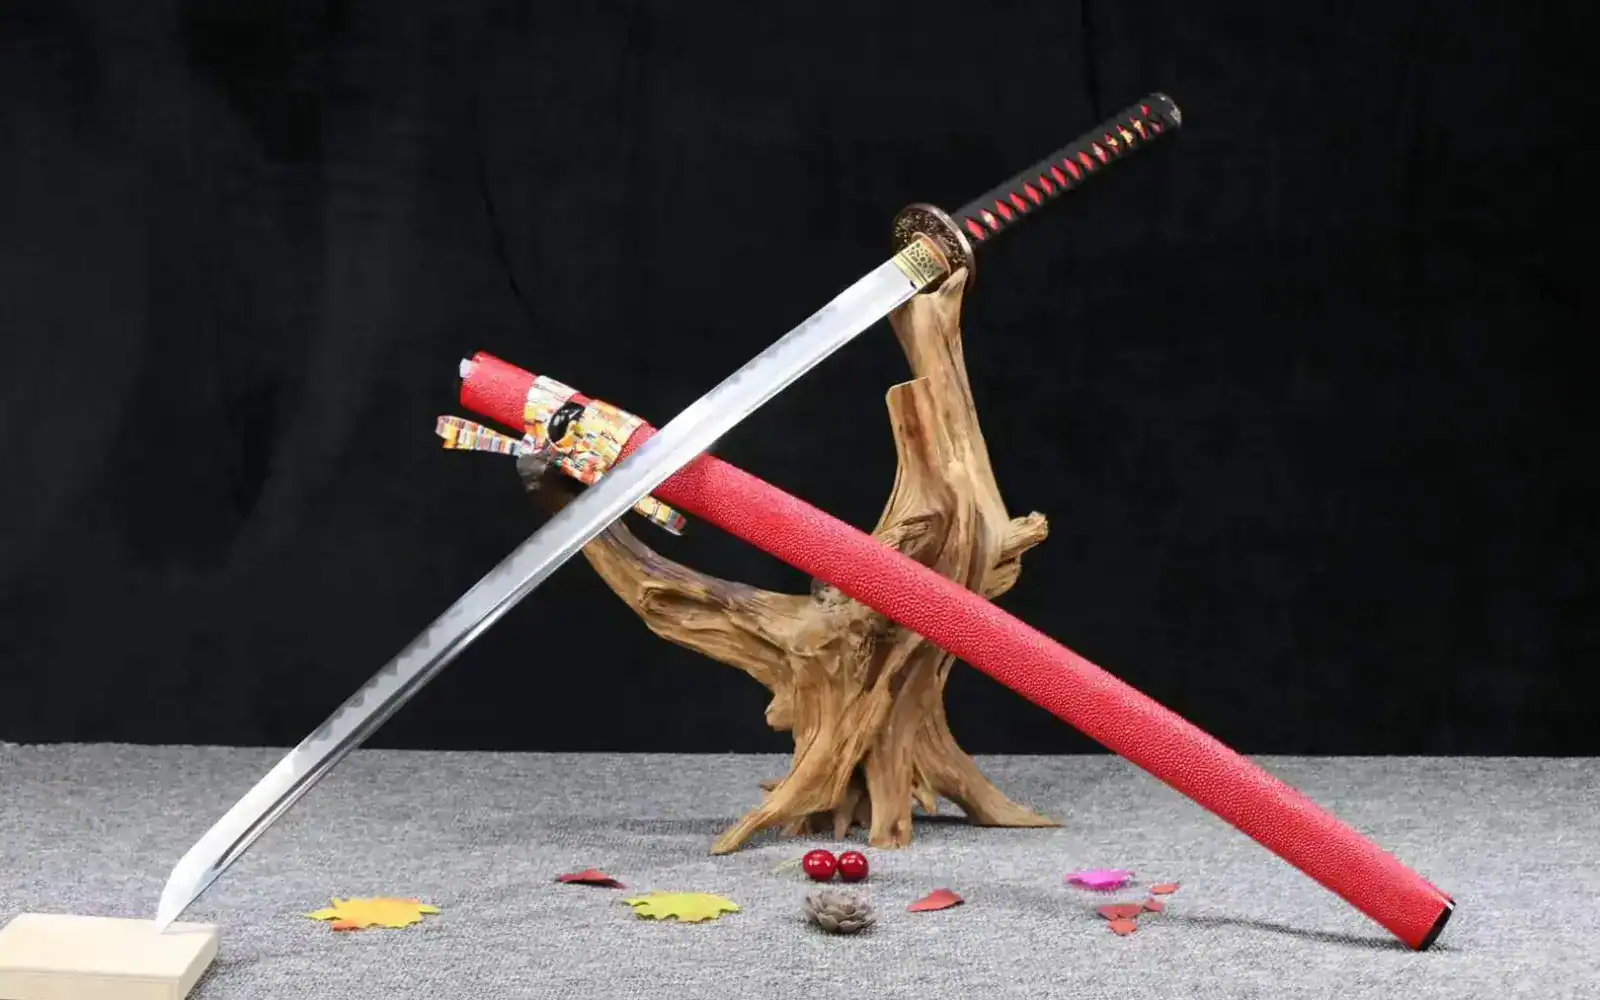
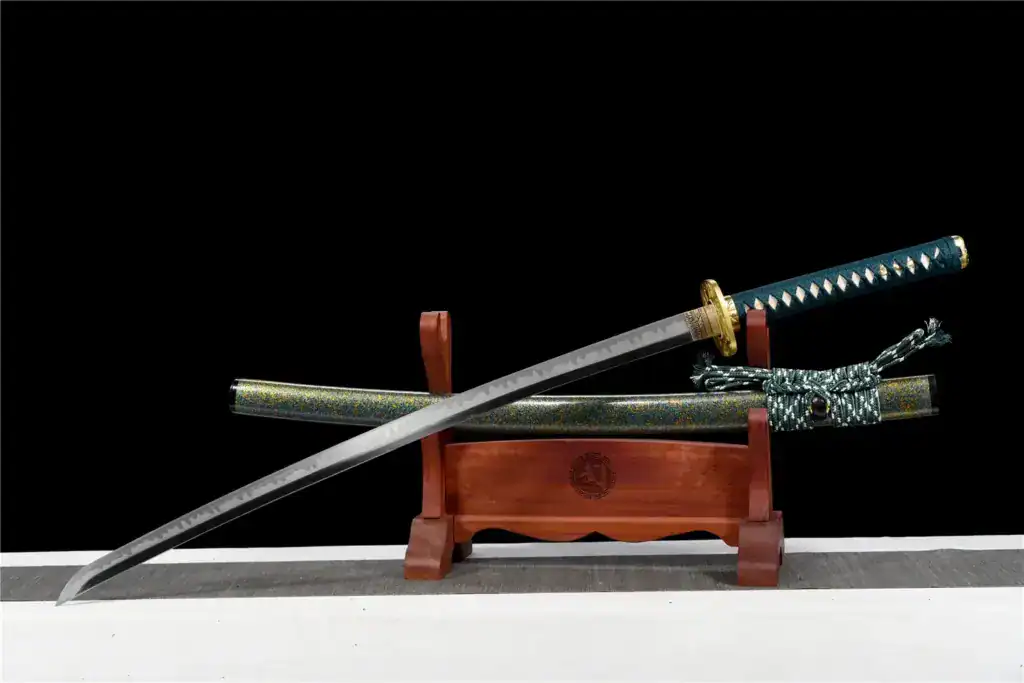
Picking a Scabbard (Saya) and Display Stand for Your Katana
Saya (scabbard) completes the sword’s visual identity and protects the blade during storage. Options range from natural wood grain and solid lacquer colors to carved designs and multi-color finishes.
Sageo (scabbard cord) is a color and material accent. You can match it to the handle wrap for a unified look or contrast it for visual interest. This is a low-stakes choice that comes down to personal preference.
A sword stand is the final step in the build:
- Single-tier stands: display one sword cleanly
- Multi-tier stands: work for collectors building a daisho (matched katana and wakizashi set) or a larger collection
Once the sword arrives, proper storage and regular maintenance keep the blade and fittings in top condition. The guide on how to care for a katana covers oiling schedules, storage tips, and common mistakes to avoid.
Frequently Asked Questions About Designing a Custom Katana
How Much Does a Custom Katana Cost?
Pricing depends on steel type, fittings, and customization complexity. Entry-level builds start around $200 to $300 with basic steel and standard components. Premium builds with T10 or Tamahagane replica steel, upgraded polish, and custom-themed fittings reach $500 to $800 or more. Most builders show pricing at each step so you can track costs as you go.
How Long Does It Take to Forge a Custom Katana?
Typical turnaround is 4 to 5 weeks from order confirmation. Complex builds or bespoke requests may take longer. Kato contacts buyers to confirm the full design before forging begins.
Can I Modify My Custom Katana Design After Ordering?
Contact the team as early as possible. Changes are sometimes possible in the early production stages, but once forging is underway, modifications become limited.
What Custom Katana Options Should Beginners Leave at Default?
Focus your attention on steel type, blade length, edge style, hamon pattern, and tsuba/fittings theme. These five choices shape performance, appearance, and price the most. Options like blade width, blade thickness, habaki and seppa, yokote style, and standard groove setup are safe to leave at their defaults unless you have a specific reason to change them.
Should I Design a Custom Katana or Buy a Ready-Made One?
A ready-made katana works if you want a standard build shipped fast with minimal decisions. A custom katana is worth it when you have a specific preference for steel type, blade length, fittings theme, or replica accuracy that off-the-shelf options do not cover. If you care about controlling the details of your build rather than accepting someone else’s defaults, custom is the better path.
What Does a Safe First Custom Katana Build Look Like?
If you want a reliable starting point without overthinking every option, this combination covers most first-time buyers:
- Steel: 1060 (budget-friendly and functional) or T10 (stronger edge retention, clearer hamon)
- Blade shape: Shinogi-Zukuri
- Blade length: standard 27 to 28 inches
- Edge: sharp for cutting, blunt for display
- Hamon: Midare (most popular) or Suguha (clean and minimal)
- Handle wrap: cotton
- Fittings: standard matched set
- Saya: simple lacquer finish
Start here, then adjust individual options once you know what matters most to you.
Design Your Custom Katana with Kato
Start with purpose and budget, then focus on the five choices that shape your build: steel, blade length, edge, hamon, and fittings theme. Leave secondary specs at their defaults unless you know why you are changing them.
Kato’s custom katana builder walks through each step with descriptions and real-time pricing. Anything the configurator does not cover can be handled via live chat or email with reference images. After you place your order, the team contacts you to confirm every detail before forging begins. Nothing is forged until you give official approval.
- Ready to start? Open the custom katana builder and follow the sequence from this guide
- Still deciding on steel or blade length? Start with the guides linked above and come back when your priorities are clear


