


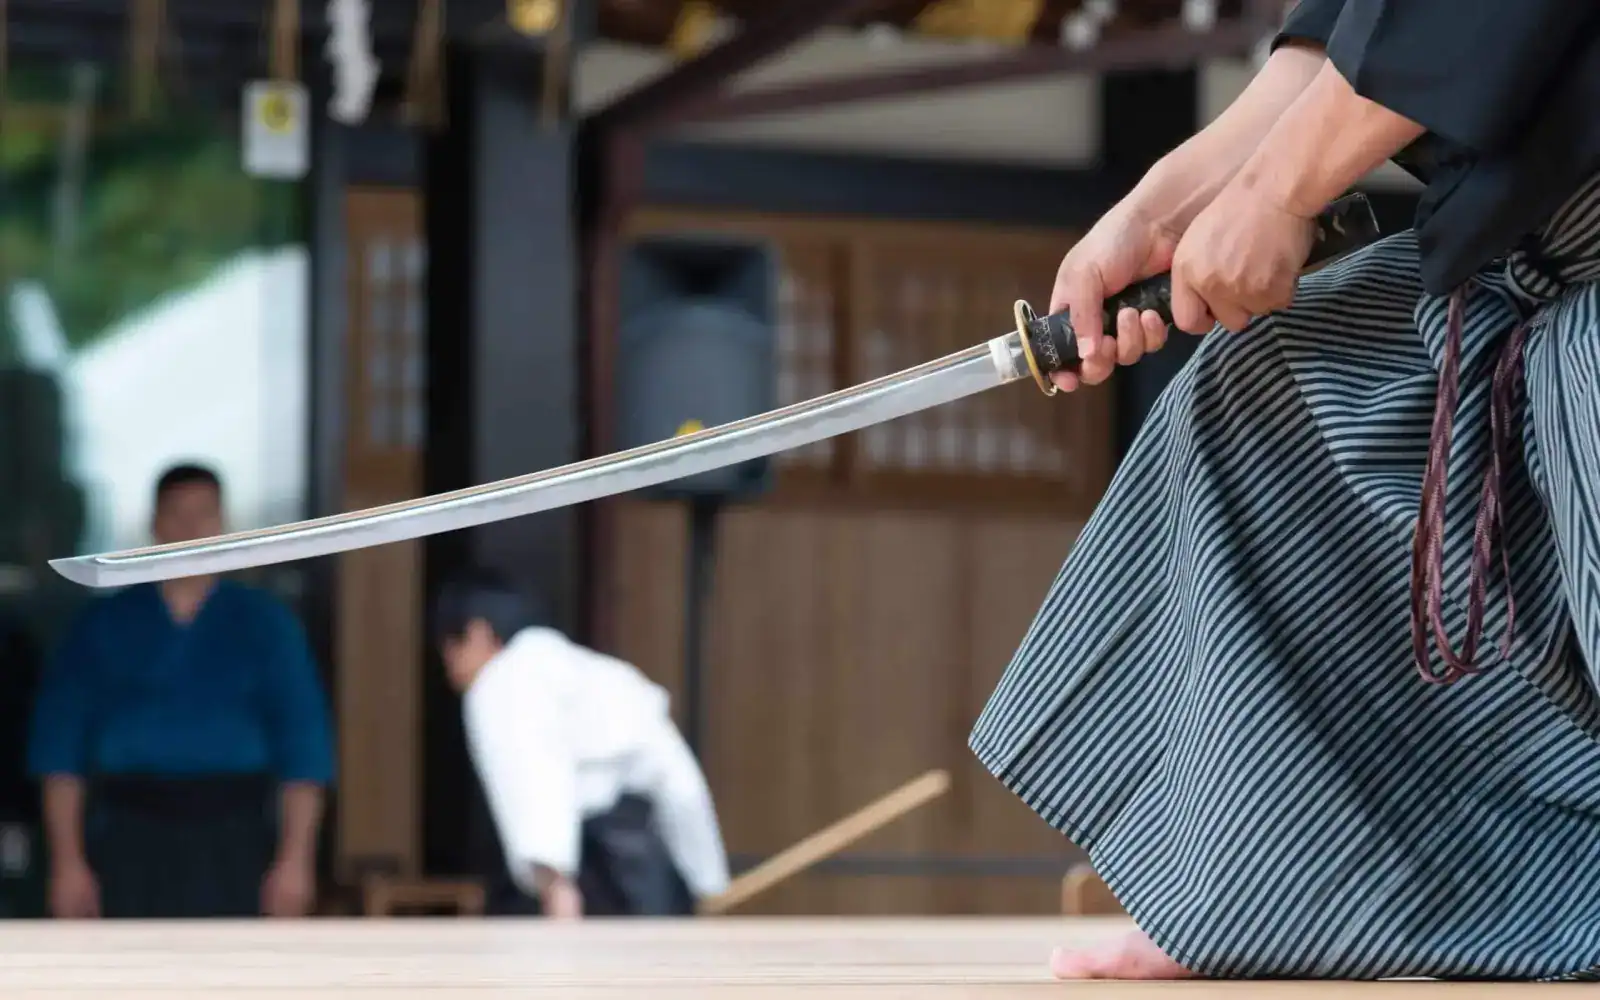
How to Sharpen a Katana at Home?
If you’re learning how to sharpen a katana without damaging the blade, start by figuring out whether the sword needs sharpening at all or just basic cleaning. A modern 1060, 1095, or T10 cutter can often be maintained at home with water stones, slow one-direction strokes, and a steady reference angle that preserves the blade’s existing geometry. The job gets risky when people rush, use dry stones, or sharpen a katana as if it were a kitchen knife.
For most modern production katanas, sharpen with Japanese water stones in a controlled grit progression from 400 to 8000, keep the stone wet at all times, and use smooth one-direction strokes from base to tip. A rough 15-20 degree reference can help beginners, but the real priority is preserving the blade’s existing convex edge geometry. Finish by checking the edge under bright light and confirming a clean paper slice. Never use power tools or pull-through sharpeners on a katana.
This guide covers maintenance-level sharpening for modern functional high-carbon steel katanas. It does not apply to antique Nihonto, blades with severe structural damage, or high-value collector pieces that need professional togishi (traditional sword polisher) work.

Does Your Katana Actually Need Sharpening?
A blade that only looks cloudy from old oil does not need steel removed. Decide what condition you are seeing before the first stroke, because the safest fix for one problem can damage the blade if you apply it to another.
- Safe to sharpen at home: A functional high-carbon steel katana with mild to moderate dullness, no visible chips, and no bend.
- Send to a professional: Antique blades, deep chips, cracks, bends, heavy rust, or a collector-grade polish you want to preserve.
- Not worth sharpening: Stainless display replicas, decorative wall hangers, and rat-tail tang imitations built for looks instead of cutting.
| Edge Condition | What You See | Action |
| Oil haze or surface grime | Cloudy appearance, no bright reflection along ha | Clean only — no stones needed |
| Light dullness | Minor drag on paper, edge still mostly bites | Touch-up on 3000 grit or finer |
| Truly dull edge | Bright flat spots visible under lamp | Full progression starting at 400–800 grit |
| Chips, bends, or deformation | Edge catches fingernail deeply, visible damage | Send to a professional — not home sharpening |
A collector keeping a T10 katana on an office stand may notice haze near the ha (cutting edge) after months of display. That is usually a cleaning issue. A backyard cutter using a 1095 blade for weekend tatami practice may see bright flashes along the edge under a lamp. Those reflected spots usually mean the edge has gone flat and needs sharpening.
Use the light test before you commit. Hold the edge under a bright lamp and slowly roll the blade. A sharp edge disappears in the light. Bright lines or dots along the ha show dull areas that still need work.
What Should You Do With a New Katana That Has a Rough Factory Edge?
If your blade arrived new and the edge drags on paper more than expected, resist the urge to reach for a coarse stone immediately. Most modern production katanas ship with a functional but unrefined factory edge. The right first step is to run a paper test and try a light cutting session before touching any abrasive at all.
If the blade cuts cleanly, even if not impressively, leave it and use it for a session or two first. A real performance problem will show up quickly in use. If the edge genuinely fails the paper test or feels rough and uneven across the full length, a light touch-up starting at 1000–3000 grit is usually enough. Do not rebuild the bevel on a new blade unless you have clear evidence that the factory geometry is wrong — starting coarse removes steel you did not need to remove.
What Do You Need to Sharpen a Katana at Home?
Most guides on how to sharpen a katana jump straight to grit numbers, but preparation prevents most beginner mistakes. Get two things right first: the abrasives you will use and a workspace that lets you control a full-length blade without rushing.
Which Whetstone and Grit Progression Should You Use for a Katana?
A katana edge responds best to a steady progression instead of one all-purpose stone. Use each grit for a specific job, then move up only when the scratch pattern is even.
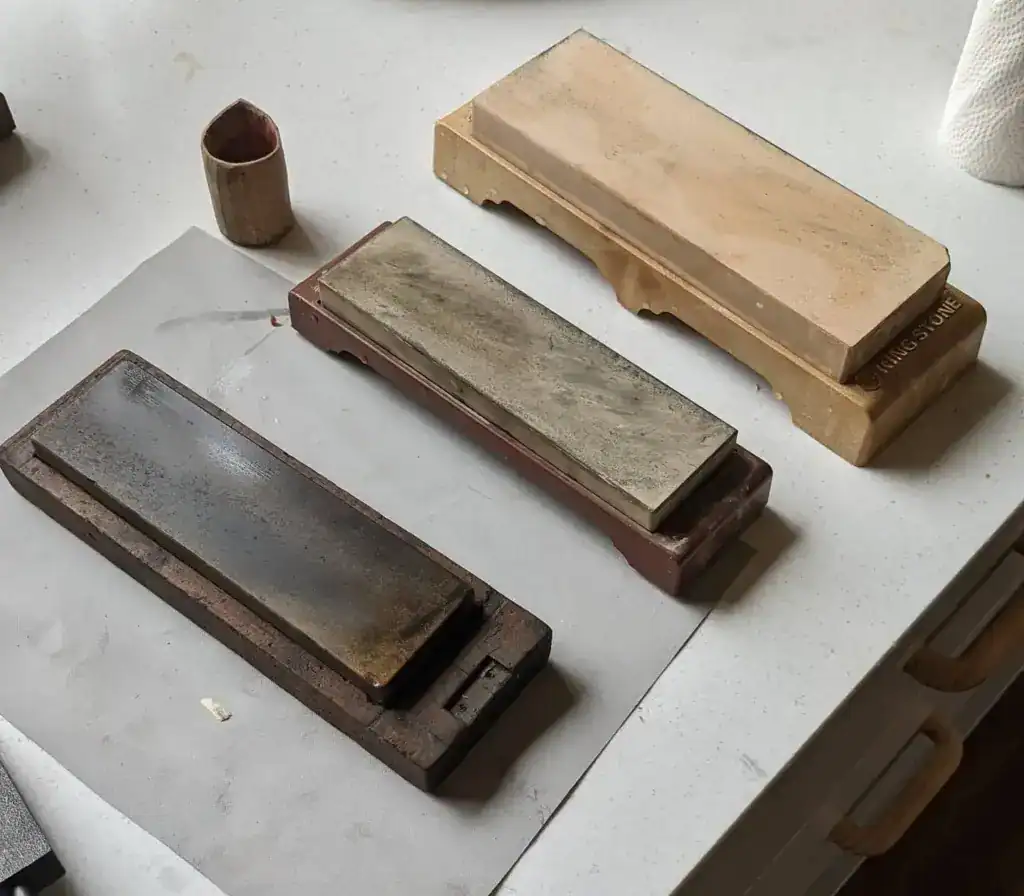
| Grit Range | Purpose | When to Use |
| 400-800 | Coarse sharpening | Re-establish the edge on a visibly dull blade or remove small nicks. |
| 1000-3000 | Edge refinement | Smooth coarse scratches and build practical cutting sharpness. |
| 3000-8000 | Final polish | Refine the finish and remove micro-burrs for a cleaner edge. |
Japanese water stones (toishi) are preferred because they cut with good control and create slurry, which is the thin abrasive paste that helps refine the surface. Synthetic waterstones are an accessible starting point for most owners. A nagura stone (small conditioning stone) helps refresh the whetstone surface if it starts loading up.
How Should You Set Up Your Workspace Before Sharpening a Katana?
Give the blade room before you give it pressure. Work in a clean, quiet, well-lit space where the full sword can move from base to tip without hitting a wall, table edge, or chair back.
Experienced owners sometimes remove the mekugi (bamboo peg) and tsuka (handle) for full blade access. Beginners do not need to treat disassembly as mandatory. Keeping the handle installed is fine if the sword is fully supported and your grip stays controlled.
- Stone stability: Set each stone on a flat non-slip base or damp towel so it cannot skate during the stroke.
- Working height: Position the stone around waist height so your shoulders stay relaxed and the angle stays consistent.
- Lubrication: Follow the stone maker’s instructions. Many soaking waterstones need around 10-15 minutes in water, while some fine stones are splash-and-go, so keep a spray bottle nearby and never let the surface dry out.
- Safety gear: Wear cut-resistant gloves, keep the edge pointed away from your body, and use deliberate movements instead of fast passes.
How to Sharpen a Katana Step by Step
If you are learning how to sharpen a katana for the first time, name the blade landmarks before the first stroke. The ha is the cutting edge, the mune is the spine, the shinogi is the ridge line, and the kissaki is the tip. If you want a full diagram before starting, review the parts of a katana.
The goal is to restore clean cutting performance while preserving the original niku (convex blade geometry). You are not trying to create a brand-new profile or grind the edge as thin as possible. A katana that keeps its convex support behind the edge will usually hold up better in actual cutting.
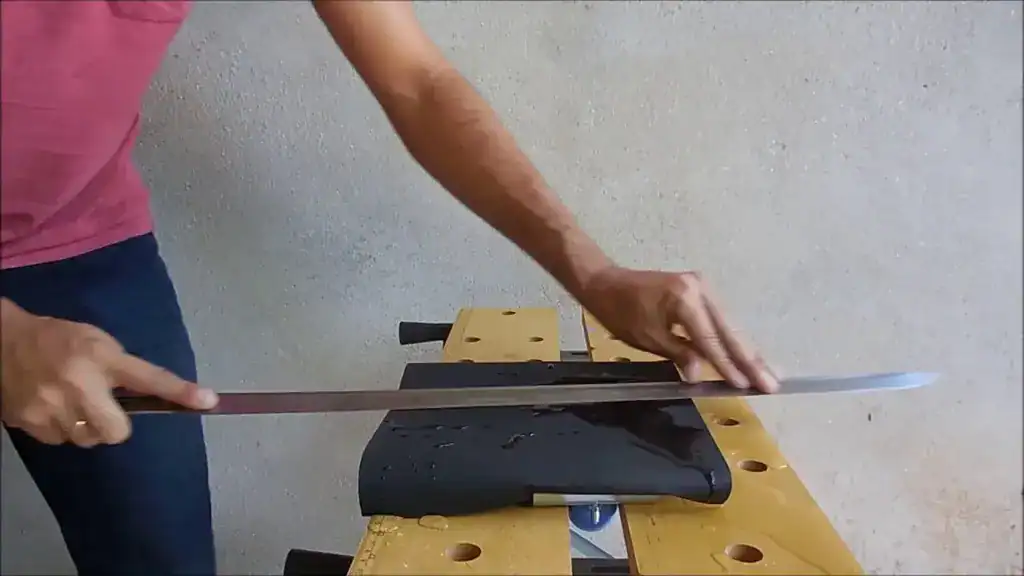
Coarse Katana Sharpening for a Dull or Nicked Edge (400-800 Grit)
Start coarse only when the edge is truly dull or has small nicks. If the blade still bites paper with minor dragging, jumping straight to a coarse stone usually removes more steel than you need.
- Angle: For many modern production katanas, a rough 15-20 degree reference can help beginners, but the safer goal is matching the blade’s existing edge geometry instead of forcing a new bevel.
- Stroke: Move in one direction from the base near the handle toward the kissaki. Lift, reset, and repeat. Do not saw back and forth.
- Pressure: Use moderate pressure on the forward cutting stroke, then release on the return. Let the blade’s weight do part of the work.
- Alternating sides: Switch after a few controlled passes per side, then reassess whether a burr is forming on the opposite side before continuing. Dullness level and stone speed both affect how many passes you actually need.
A modern 1060 cutter with a few light edge nicks from poor targets often responds well here if you stay patient. If the nick catches a fingernail deeply or the edge line looks visibly deformed, stop and move that blade into the professional category.
Refining a Katana Edge for Cutting Sharpness (1000-3000 Grit)
This stage turns a repaired edge into a usable cutting edge. Reduce pressure compared with the coarse stone and focus on smoothing the earlier scratches instead of forcing more metal off the blade.
Steel response changes with the alloy. 1095 high-carbon steel often sharpens faster and tells on your technique quickly, while T10 usually feels harder and slower at this stage. If you want the broader comparison, see these katana steel types.
Check progress often under bright light. The scratch pattern should look finer and more even from base to tip. If one section still shows deeper coarse marks, stay on the current grit until that area catches up instead of rushing upward.
Final Katana Edge Polishing and Refinement (3000-8000 Grit)
Fine stones are for refinement, not rescue work. At this stage you are removing very little metal and cleaning up the apex of the edge so the blade feels crisp instead of toothy or ragged.
Keep the same angle and lighten your hand even more. The stroke should feel easy, almost like you are guiding the blade over the surface instead of grinding into it. If the stone starts drying or loading with swarf, add water before the next pass.

Fine polishing can make the hamon (temper line) easier to see on some differentially hardened blades, but the result depends on steel and heat treatment. Do not chase hamon contrast as a sharpening goal. That is separate from ordinary edge maintenance and easy to overdo.
How to Test if Your Katana Is Sharp Enough
The safest way to learn how to sharpen a katana is to stop once the sword is functionally sharp. Chasing a razor-thin edge past that point can flatten the niku and make the blade more likely to chip during its next cutting session.
- Paper slice test: Hold a sheet of printer paper vertically and make a controlled draw cut. A properly sharpened blade should pass through cleanly without tearing or hanging up.
- Visual inspection: Roll the edge under bright light. A sharp edge should show almost no reflected line, while dull or rolled spots flash back at you.
- When to stop: Stop when the paper cut is clean and no bright spots remain. Functional sharpness matters more than extreme thinness.
If you want a clearer benchmark for practical use, read more about how sharp a katana should be. That helps separate a solid cutting edge from an over-sharpened edge that looks impressive once and chips later.

How Sharp Does a Katana Need to Be for Cutting Versus Display?
The answer depends entirely on how the sword is used. A blade kept on a stand or wall mount does not need working sharpness at all. The paper test and light test are unnecessary for a display piece. What matters there is clean steel, no rust, and a light coat of oil.
A blade used for backyard cutting practice — tatami mats, light bamboo, or similar targets — needs a reliable working edge that holds up through a session without chipping or rolling. That means a clean paper slice and no bright flat spots under the light, but not a mirror-polished razor finish. Pushing past functional sharpness makes the edge thinner and more fragile without improving performance on soft targets. For most cutting use, functional is enough.
Can You Sharpen a Katana Without Whetstones?
Yes, but only in a limited way. High-grit sandpaper in the 400-2000 range, fixed to a perfectly flat glass or granite surface, can handle a light touch-up on a production blade if you keep the angle stable and use one-direction strokes. It is not a full substitute for a proper water stone progression.
- Use with caution: Sandpaper can work for mild touch-ups on a modern blade with no collector finish.
- Avoid pull-through sharpeners: Kitchen-style sharpeners remove steel at the wrong angle and can destroy a katana’s convex geometry fast.
- Avoid power tools completely: Belt sanders and grinders create localized heat that can ruin the temper and remove material too aggressively.
If you only own a decorative replica, do not use this as a reason to experiment. Home improvisation makes the most sense on a real functional katana that is already worth maintaining.
Common Katana Sharpening Mistakes to Avoid
Most bad sharpening results come from a short list of repeat mistakes. They usually start with impatience, not bad equipment.
- Flattening the niku: Grinding too flat removes support behind the edge and makes the blade more brittle and chip-prone.
- Skipping grit stages: Jumping from coarse straight to fine leaves deep scratches behind and usually produces an edge that dulls faster.
- Using too much pressure: Heavy pressure creates uneven grinding, larger burrs, and more steel loss than the blade needs.
- Sharpening dry: A dry stone clogs quickly and can create extra friction and heat that you do not want near a hardened edge.
- Over-polishing the hamon: Aggressive abrasive work can obscure the hamon over time. If you want to understand what you are protecting, review hamon on a katana.
If you want one practical rule, keep each step boring. Slow strokes, wet stones, and frequent checks usually beat forceful sharpening every time.
When Should You Send Your Katana to a Professional?
Send the sword out when the problem is structural instead of routine. Deep chips, bends, cracks, heavy rust, and corrosion that reaches into the edge all go beyond normal maintenance sharpening.
- Modern production blade with light dullness: Home sharpening is usually the cheaper starting point.
- Collector blade or antique Nihonto: Professional work is the better choice because value and original finish matter as much as sharpness.
- Visible damage: Any crack, bend, or major chip is a stop sign, not a challenge.
Antique Nihonto and high-end custom blades should be handled only by a trained togishi, because amateur sharpening can permanently obscure the hamon, jihada, and other features that affect appraisal value. Professional pricing varies widely by blade condition, length, and scope of work. Full traditional polishing for valuable Japanese swords is a separate discipline entirely and can cost far more than routine edge maintenance.
If you are still building sharpening experience, starting with a durable production blade is safer than experimenting on a collector piece.
Whether the blade was sharpened at home or by a shop, regular cleaning and oiling will do more for long-term edge life than aggressive resharpening. For the full maintenance routine, read how to care for a katana.
Frequently Asked Questions About Katana Sharpening
Can you sharpen a katana with a whetstone?
Yes. Japanese water stones (toishi) are the recommended tool for katana sharpening at home. They cut with good control, produce slurry that helps refine the surface, and are available in the full grit range needed for maintenance sharpening. Synthetic waterstones are a practical starting point for most owners and work well on modern high-carbon steel production blades.
What angle should you use to sharpen a katana?
There is no single correct number. Many owners use a low reference angle, often somewhere in the range of 10–20 degrees depending on the existing edge, but matching the blade’s original geometry matters more than hitting any fixed figure. The safer approach is to find the angle where the existing bevel meets the stone and keep that consistent throughout the session, rather than forcing a new profile.
How often should you sharpen a katana?
Sharpen only when the edge shows real performance loss. A display blade may go years without needing stones, while a training katana used for cutting should be inspected after each session and may need a light touch-up every few months. Regular cleaning and oiling reduce how often full sharpening becomes necessary.
Can you use a knife sharpener on a katana?
No, a household knife sharpener is the wrong tool for a katana. Pull-through and V-slot sharpeners do not control angle well enough for a convex sword edge, and they remove steel in a way that can flatten geometry and leave uneven damage along the ha.
Will sharpening damage the hamon?
Routine edge maintenance on a modern production blade may leave the hamon visually intact, but repeated abrasive work can reduce contrast over time on differentially hardened steel. The risk increases with aggressive polishing, incorrect abrasives, and heavy pressure. If the hamon is part of the blade’s visual or appraisal value, that blade should go to a togishi rather than a whetstone at home.
Can you sharpen a katana without ruining the blade geometry?
Yes, you can sharpen a katana safely if you hold a steady reference angle, follow the blade’s natural convex shape, and stop once cutting performance is restored. For many production blades, roughly 15-20 degrees can work as a starting guide, but preserving the original geometry matters more than hitting a fixed number exactly.
Keep Your Katana Sharp Without Wearing It Down
Light touch-ups on finer stones usually make more sense than waiting until the edge gets dull and doing heavy reshaping. You remove less steel, keep the original edge geometry more intact, and stay in control of how the blade performs in real cutting.
Technique matters, and so does the blade itself. Different steels can respond a little differently during sharpening and edge upkeep, so it helps to pay attention to how your katana behaves over time. A blade that gets regular, careful maintenance is usually easier to manage in the long run than one that is left dull and then aggressively reworked.
If you understand the sharpening process and now need a sword built for regular use and easy long-term maintenance, these functional katanas use proper high-carbon steel and are designed for owners who actually cut.


