


How to Wrap a Katana Handle With Ito and Hishigami
Learning how to wrap a katana handle usually starts with loose ito, crushed diamonds, or a display sword that no longer looks right. The basic work is to anchor the ito near the fuchi, cross over samegawa, add hishigami under the folds, set the menuki, and finish the kashira knot.
Before you buy cord, decide whether the handle belongs on your workbench. New ito can improve grip feel and appearance, but it cannot fix a cracked tsuka core, loose mekugi, poor nakago fit, steel quality, hamon, or heat treatment. Some handles need repair before they need a new wrap.
Katana Handle Wrapping: The Short Version
- Work on a spare tsuka, trainer, or project sword.
- Photograph the old ito, menuki, fittings, knot, and spacing.
- Check the core, mekugi, samegawa, and fittings before new ito.
- Mark diamond spacing before tension hides mistakes.
- Use hishigami under each fold.
- Finish the kashira knot, then test for movement.
Before You Wrap: Practice or Repair?
Start with the handle, not the color. A spare tsuka, wooden trainer, cosplay sword, wall hanger, or inexpensive project sword gives you room to learn without risking a blade you care about.
A sharp shinken, valuable nihonto, inherited blade, stuck handle, unknown build, or sword intended for cutting practice needs a higher bar. New ito should not cover loose fit, cracked wood, damaged samegawa, or worn mekugi.
| Reader situation | Best next step | Why |
| Unsharpened display, prop, or cosplay sword | DIY practice | You are improving looks and feel, not cutting safety. |
| First sharp katana | Practice first | Learn tension before touching a live blade. |
| Loose tsuka or worn mekugi | Repair | New ito cannot correct bad fit or failed retention. |
| Collector or inherited sword | Specialist advice | Amateur work can reduce value or hide condition problems. |
| Exact look before purchase | Custom build | Pick the wrap, menuki, and fittings before assembly. |
A stuck tsuka is a stop sign. Do not pry, hammer, twist, or force it loose.
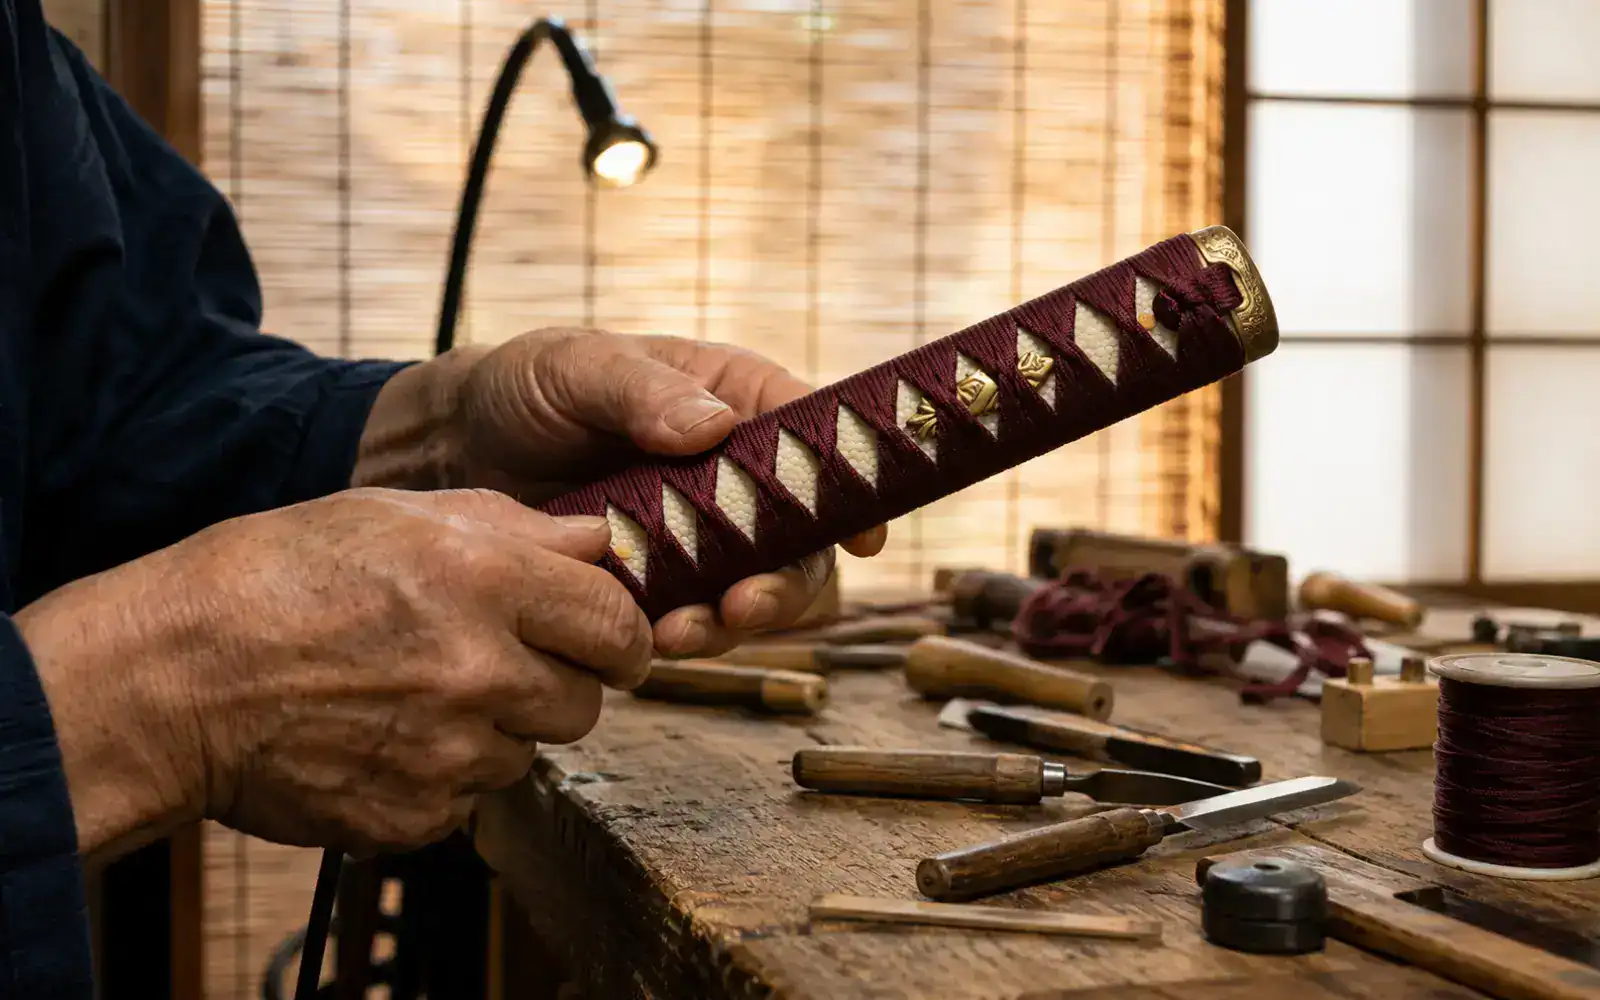
What Katana Wrapping Really Does
Tsukamaki is the wrapping of the tsuka, or handle. Ito is the cord, samegawa is the rayskin layer, hishigami are paper wedges under the crossings, hishigata are the diamond openings, and menuki are ornaments under the wrap.
Hishigami are not decoration. They support the folds so the hishigata stay raised and even. Review the parts of a katana first if fuchi, kashira, samegawa, or menuki still feel like guesswork.
The wrap can improve grip texture, stabilize the handle stack, and change the look of the sword. It does not change whether the blade is an iaito, shinken, nihonto, folded steel blade, or production katana. A new wrap also does not create a real hamon or prove differential hardening.
What You Need to Wrap a Katana Handle
For a first tsukamaki project, gather ito, hishigami, a sound tsuka, scissors, a measuring tool, and a pencil. Tweezers, a small pick, a clamp, and a blunt needle make the work less frustrating.
Light tape or adhesive can hold early passes on some modern handles, but it cannot replace tension. Glue should not make a loose core, cracked samegawa, worn mekugi, or moving handle seem acceptable.
| Material | Best fit | Tradeoff |
| Cotton ito | First DIY wrap | Grippy, affordable, easier to tension. |
| Silk ito | Refined display or custom work | Clean look, less forgiving. |
| Leather | Tactile display or custom grip | Thicker folds and harder knots. |
| Paracord | Props, cosplay, trainers | Bulky feel, poor sharp-blade choice. |
How Much Ito and Hishigami?
A common planning estimate is about 12 feet of ito for a 10 inch katana tsuka. Many modern 8 to 10 inch handles need roughly 12 to 14 feet, or 3.6 to 4.3 meters, of about 8 mm ito. Treat that as a planning estimate, not a formula.
A practical beginner rule is to measure the tsuka in inches, convert that number to feet of ito, then add about 4 feet for knots and mistakes. Leather, paracord, wide ito, thick cores, and katatemaki can need 10 to 20 percent extra.
Prepare about 60 to 70 hishigami for an average tsuka. Do not cut ito to the exact estimate unless you are experienced. Extra length is cheaper than an almost-finished wrap that cannot be knotted.
Wrap a Katana Handle Step by Step
This sequence is for a sound modern tsuka, spare core, trainer handle, or project sword. It is not antique restoration, tsuka-core construction, or proof that a questionable sword is ready for tameshigiri or training.

Step 0: Decide If It Comes Apart
Some rewraps require removing mekugi and separating the tsuka. Stop if the sword is antique, inherited, valuable, stuck, or unfamiliar. A qualified repairer, instructor, or experienced owner should inspect it first.
Step 1: Remove the Old Wrap
Photograph the ito, menuki placement, fuchi, kashira, knot direction, and spacing before removal. Loosen or cut the kashira-end cord, unwrap in reverse order, remove old hishigami, and stop if samegawa lifts or fittings feel loose.
Step 2: Inspect the Tsuka
Separate wrap problems from structure problems. Check for cracks, lifting samegawa, damaged mekugi, rattling fittings, and movement between the tsuka and nakago. Do not cut with a moving handle until the fit is corrected.
Step 3: Mark Diamond Spacing
Clean hishigata come from spacing, not luck. Mark even intervals along the handle edges before wrapping. If the first two diamonds drift, redo them right away instead of chasing the error near the kashira.
Step 4: Anchor Ito at the Fuchi
Center the ito near the fuchi so both working ends can reach the kashira. Use firm, steady tension. Pulling harder can distort folds, shift samegawa, or hide uneven pressure.
Step 5: Place Hishigami Under Folds
Place hishigami under the crossings as each diamond forms. Slide each piece under the fold before fully tightening that pass. Hold the previous diamond with your thumb while you pull the next section so the spacing does not collapse.
Step 6: Set the Menuki
Menuki should look intentional and stay stable under the wrap. Correct slipping ornaments immediately. Later diamonds will not reliably fix poor placement.
Step 7: Check Each Diamond
Alternate tension and twist direction with each pass. Check the diamond shape, fold direction, and cord angle before continuing. Restarting from the error point is cleaner than forcing the rest of the wrap to compensate.
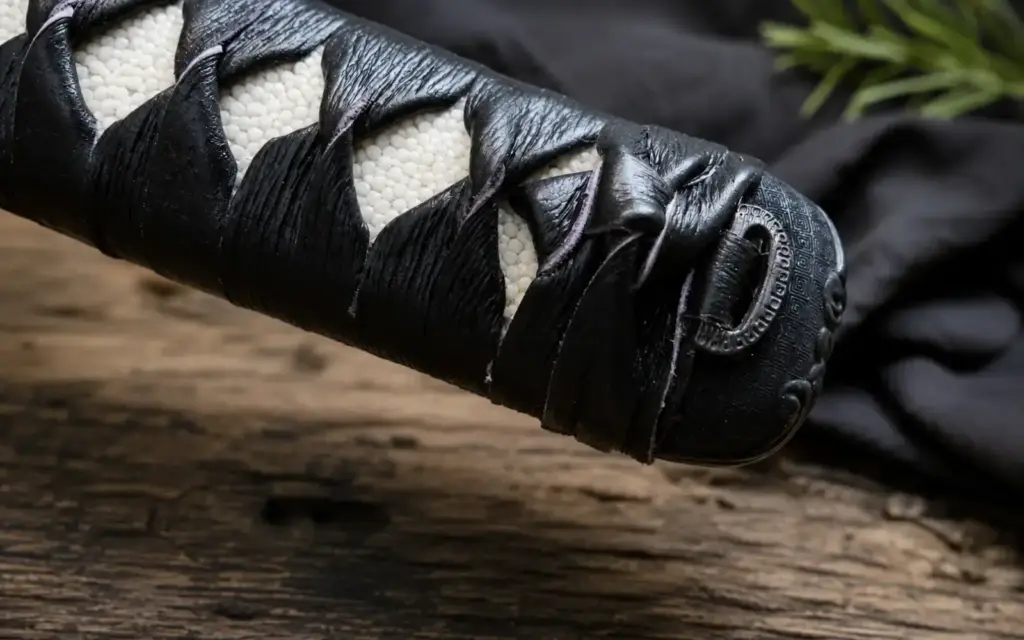
Step 8: Finish the Knot and Test
Finish the kashira knot by threading, tucking, trimming, and keeping the knot low enough that it does not catch in the hand. Press the diamonds, twist the wrap gently, and stop cutting use if the ito, menuki, fittings, or tsuka move.
Fix These Wrap Mistakes Early
Most wrapping mistakes are fixable if you catch them before the sword is used, displayed as finished, or given as a gift.
- Loose diamonds usually mean uneven tension or missing hishigami. Redo the loose section before use.
- Slipping menuki usually means poor placement or weak pressure. Reset it before continuing.
- A bulky kashira knot usually means too much cord or poor tucking. Redo the final section.
- Visible glue or tape usually means a shortcut is replacing tension. Use less aid and improve the wrap.
If the tsuka moves on the tang: stop all use immediately. This is a structural problem, not a wrapping problem, and it should be handled through repair, specialist inspection, or replacement.
Which Wrap Style Should Beginners Use?
Start with hinerimaki if this is your first wrap. It is the standard twist style, and mistakes are easier to see while you work. Katatemaki has a battle-wrap look, but it is a better custom choice than a first repair attempt.
Match the wrap to how the sword will be used or displayed. Display buyers can prioritize clean diamonds and color. Gift buyers should avoid sharp swords unless the recipient can store them responsibly. Cosplay builds can use paracord or decorative wraps. Training and cutting buyers should follow instructor guidance and check local laws before using a sharp blade.
Choose a custom katana when you already know the wrap style, cord color, menuki, fittings, and blade finish you want. Keep DIY for practice or a low-risk project sword.
When Not to Rewrap the Handle
If the tsuka core is cracked, samegawa is lifting, tang fit is poor, or the wrap keeps failing, do not treat it as a simple wrapping job. Use repair, replacement, or specialist inspection instead.
Folded steel, Damascus-style patterns, dramatic hamon photos, or “battle ready” wording should not distract buyers from the handle. Look for clear seller information about tang, mekugi, fittings, sharpening status, intended use, and whether the sword is display-only or built for controlled cutting practice.
KatoKatana’s full tang katana guide can help you check the construction before replacing anything. Repair comes first when the sword has value; compare functional katanas only when repair is not practical and the current sword’s construction is unknown.
FAQ About Katana Handle Wrapping
How much ito do I need?
A standard 8 to 10 inch tsuka often needs roughly 12 to 14 feet of about 8 mm ito. Narrower or wider cord can change the estimate significantly.
How do I know if the wrap is tight enough?
Ito should not shift under firm thumb pressure, hishigata should stay aligned, menuki should not slide, and the tsuka should not move on the nakago.
Can I tighten loose ito without rewrapping?
Usually no. If the ito shifts or diamonds collapse, the cleaner fix is a proper rewrap. Glue, tape, or lacquer should not be used to make a sharp sword seem safe.
Rewrap, Customize, or Replace?
Rewrap a spare, trainer, or display-only handle for practice. Choose custom before purchase when the wrap, fittings, color, and blade finish matter. Stop using the sword and seek repair or replacement when the handle moves, the core is damaged, or the construction is unknown.


